Support Centre
Find the answers to your questions and get the support you need with the VentraIP help centre.
Browse by Popular

Domain Name
- What is a domain name?Eligibility criteria for registering .AU domain namesPremium domain names explained

Web Hosting
View All
Email Hosting
View All
Google Workspace
- Getting Started with Google WorkspaceGoogle Workspace support resourcesTransferring an existing Google Workspace service to VentraIP

Account
- How do I reset my VIPcontrol password?How do I create a VentraIP account?How can I see who accessed my VentraIP account?

Troubleshooting
- How do I clear my browser cache?Troubleshooting a ‘500 internal server' errorTroubleshooting with a ping test
How to setup calendars for your dedicated email hosting service in eM Client
IMPORTANT: Please be advised that email software setup is not within the scope of our support, meaning that our technical support team cannot assist you with the setup of your email software.
eM client is a free email client that you can use to read emails and manage calendars, much like Thunderbird. If you’d like to access your calendars via eM client, here are the steps:
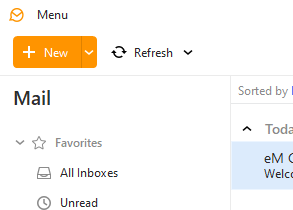
- Open eM client and click on the Menu option at the top left of the interface

- Click on the Accounts option
- If you have not setup any accounts yet, select Calendar then click CalDAV. If you have accounts setup already, you may need to click Add Account first.
- Click Next
- Input the CalDAV server details:
- The Account Address field needs to be set to http://ventraip.email/Calendar/Calendar
- The Username and Password fields need to be set to the same username and password you use to login to your email account
- Click Next
- Set the Account Name (this can be what ever you like)
- Click Next
To view the calendar, click the calendar option to the bottom left of the eM client interface.
![]()
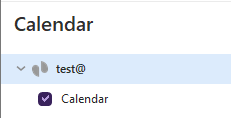
Then make sure you click on the drop down next to the user in the list, then click Calendar. This will make the items/events in your Calendar appear.


We Are Here to Help You
Get in touch with one of our local experts at any time.